Properties View
- Former user (Deleted)
- Former user (Deleted)
- Former user (Deleted)
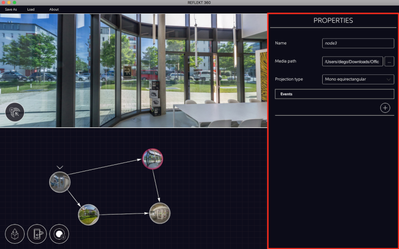
The Properties View enables you to see and edit all of the details of your experience: which 360° image or video to use, which Action to take when the users looks at an Interactive Element, etc.
The Properties View displays the properties of the current selected component.
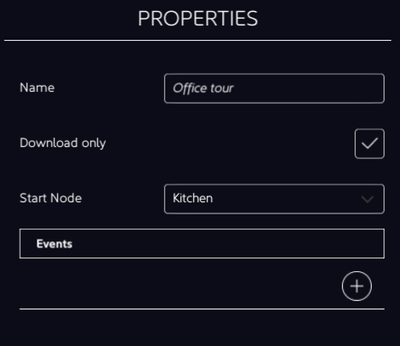
Experience properties
Those are general properties of your cinex. They can be shown by clicking on any empty space of the Storyboard View, or by clicking escape on the keyboard until no component is selected.
| Property | Description | Usage / recommendation |
|---|---|---|
| Download only | Indicates whether users will be able to stream the Cinex or if the user will have to download it first | When streaming is activated, the users are able to start the Cinex via streaming (otherwise they need to download the full experience to play it). In case of streaming, only the images and sounds are downloaded, and the videos are streamed on demand. This option is recommended if your experience contains large videos. On the contrary, if your experience mostly contains images, it will have little effect. |
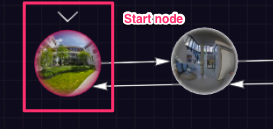
| Start node | Indicates the entering point of the experience. | This will select which node the user starts in. The start node is indicated by an arrow.
|
| Events | Adds Time Events which happen in Experience Time. The latter is counted since the beginning of the Cinex. | This is mainly used for persistent Interactive Elements (see Detail View to know how to create them). A good example of usage is to start or stop a soundtrack. If you need to start a soundtrack one second after starting the cinex, you can add a Time Event here. See Events to know how to in detail. |
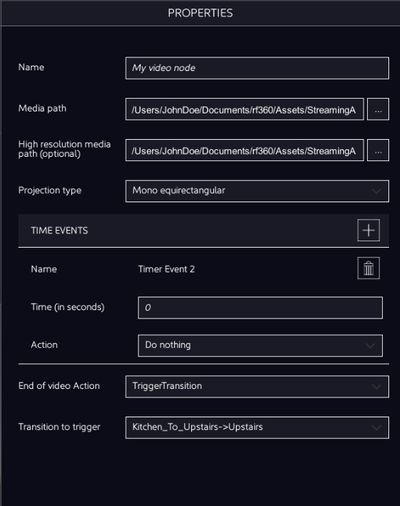
Node properties
The Node properties are shown when you click on a Node on the Storyboard. They contain a lot of important information: this is where you can choose the environment (360° image or video), as well as edit Time Events that take place inside a Node.
| Property | Description | Usage / recommendation |
|---|---|---|
| Media path | Path to the media of the environment. | This is the most important property. It enables you to select the 360 environment for this node. Click on the button with the 3 points to open a browser window to select your 360 video or image. |
| High Resolution Media Path | Optionally, you can include higher resolution (4K) image or video content. This content will be used on high-end devices that support this level of quality. | Note that a 4K resolution is content within the following range: 1920x1080px to 4096x2048px. If the content is above this range, it may result in unexpected behaviours that negatively affect the experience. If the content is below this range, it should rather be set within the normal Media Path. |
| Projection type | Environment's projection type. | This is related to the type of image or video you have chosen. In general, it can be a mono or stereo (side-by-side) equirectangular image or video. Please refer to Content requirements for more details. |
| Events | Timer Events which happen in Node Time. This is the time since the instant the User enters the Node. | Each Node has a timer which measures the elapsed time since the first entering. If you want an element to disappear right after the showing the Node, you can do so by adding an event with Time (in seconds) = 0. See Editing events to know how in detail. |
| End of video Action | Action to take when video of the 360° Environment reaches its end. | Similar to Time or Interaction Events, select an Action and Target.
|
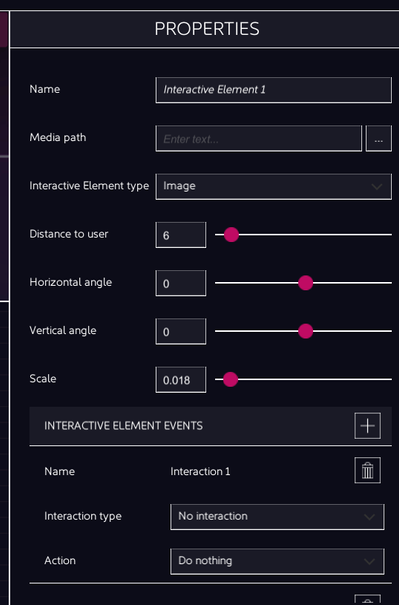
Interactive Element properties
These properties are displayed when an Interactive Element is selected in the Detail View.
| Property | Description | Usage / recommendation |
|---|---|---|
| Name | Interactive Element's name. | Give it a distinctive Name. That way it will be easier to find if there is an error. |
| Media path | Interactive Element's media path. | This is the most important property. It enables you to select the image, sound or video associated with the Interactive Element. |
Interactive Element Type | The type of Interactive Element. | It can be an Image, Invisible Image, Stereo Image, Sound or Video. Stereo images are side-by-side. New: Since the last version you are able to add Facebook Spacial Sound (.tbe files). |
| Events | The Interaction Events associated to the Interactive Elements. | It enables you to choose what happens when the user interacts with this Interactive Element. Please refer to Editing events to know which interactions are possible and what you can do with them. |
| Distance To user | The distance in meter between the user and the interactive element. | The higher the value, the further away the Interactive Element will be, reducing parallax too. The default value is currently six meters, which is an decent distance for the perception of depth. |
| Horizontal angle | Position of the interactive element on an horizontal axis. | Moving the slider on the left will rotate the Interactive Element to the left around the User's viewpoint, sliding to the right will rotate it to the right. With the value 0, the slider is in the middle, and the Interactive Element is positioned exactly where the User looks when starting the App. |
| Vertical angle | Position of the interactive element on a vertical axis. | Moving the slider to the left will move the Interactive element down around the User's viewpoint, sliding to the right will move it up. |
| Scale | Interactive Element's size. | Moving the slider to the right will make the Interactive Element larger, moving it to the left will reduce its size. |
Note: It is hard to see the difference between the Distance to user and the Scale in the Detail View. However, the difference is evident once the user sees the interactive element in the GearVR or in the Cardboard in stereo mode. Changing the scale has no impact on the depth perception (parallax), whereas changing the Distance to user does.
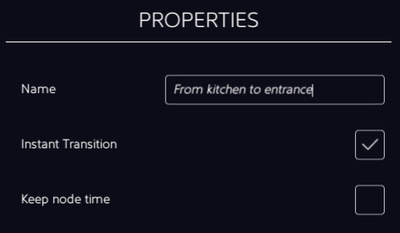
Transition properties
These properties are displayed when a transition is selected inside of the Storyboard View.
| Property | Description | Usage / recommendation |
|---|---|---|
| Instant Transition | Whether the transition is instantaneous, or a fade effect is applied. | Checking this option is good if the Nodes you want to connect are directly connected similar to the Office Tour in the VRdirect App. Unchecking Instant Transition is good if you want a smooth transition between two very different Nodes. |
| Keep Node Time | Whether the transition should keep the Node Time when moving from one video to another. Note: The value only applies if two Video Nodes are used. | This option is useful when several Nodes represent an action from different points of view, but have the same time line. An example would be a concert with several videos taken from different parts of the room. Moving from one video to another should not restart the video. Instead, one should jump from one place to another while keep on hearing the concert. |
VRdirect user documentation